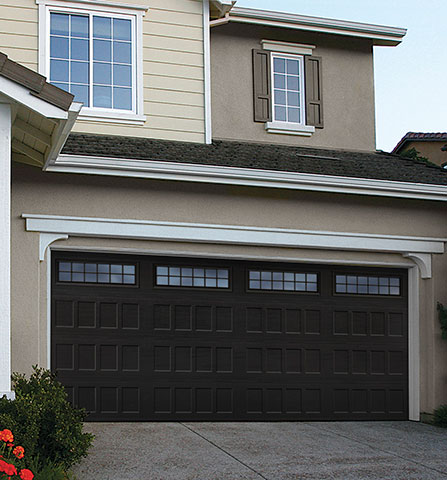
In Irvine, CA, a garage door opener installation is one of those upgrades that feels small until you use it every day. A properly installed LiftMaster garage door opener should run smoothly, respond fast, and include safety features that protect your home and family.
Installation is more than mounting a motor to the ceiling. It is about getting the door opener, sensors, wall control, remotes, and optional myQ connection working together as one system.
What a Proper LiftMaster Installation Includes
A LiftMaster garage door opener installation is successful when the opener matches the door, the hardware is secure, and the safety features work every time. If any part of that is off, the opener may still run, but it can become noisy, inconsistent, or unsafe. Even with a correct installation, routine garage door maintenance helps keep the door balanced and the hardware stable, which protects the opener from unnecessary strain.
Here is what homeowners should expect from a complete installation:
- Correct opener sizing
- Secure ceiling mounting
- Straight rail alignment
- Centered door bracket
- Safe sensor placement
- Clean wiring routing
A quality installation also includes correct settings for travel and force. These settings control how far the door moves and how much resistance the opener will tolerate before reversing.
If your opener is already installed but acting strange, a reset can sometimes help restore normal behavior, and read How to Reset a LiftMaster Garage Door Opener (Step-by-Step).
Choosing the Right LiftMaster Garage Door Opener for Your Door
The best installation starts with the right opener type. Many problems blamed on “improper installation” are actually caused by pairing the wrong opener strength or style with the door.
Match the opener to the door size and weight
A heavier door needs more lifting power and smoother control. Large doors, insulated doors, or doors with windows can weigh more than homeowners expect.
Things that affect door weight:
- Insulation thickness
- Window panels added
- Wood door sections
- Extra reinforcement bars
If the opener is undersized, it may struggle, reverse unexpectedly, or wear out sooner.
Belt drive vs chain drive
Both can work well, but they feel different.
Belt drive is often chosen for:
- Quieter operation
- Attached garages
- Bedrooms above the garage
Chain drive is often chosen for:
- Strong pulling power
- Budget-minded installs
- Detached garages
Noise is not just about the drive type. Mounting quality, door condition, and track alignment matter just as much.
Wall mount openers
Some LiftMaster models mount on the wall beside the door instead of on the ceiling. These can be a great option if you need ceiling space or want a cleaner overhead layout.
Wall mount makes sense when you have:
- High ceiling storage
- Limited ceiling headroom
- Need for a clean layout
A professional can confirm if your door setup supports a wall-mount style.
Before Installation, Check the Door Condition
A LiftMaster garage door opener installation goes best when the door itself is in good shape. If the door is heavy, binding, or out of balance, even a new opener can struggle. In that case, scheduling garage door service first is the smarter move because it prevents installing a new opener on a door that is already straining the system.
Do a simple door balance check
With the opener disconnected, lift the door by hand. It should move smoothly and stay around waist height without dropping fast.
Signs the door needs service:
- The door feels heavy
- Door drops quickly
- The door sticks in the track
- Loud roller noise
If your door has these issues, it is smarter to repair the door first. Installing a new opener on a door that is not moving correctly can lead to repeated problems.
For common problems that impact opener performance, read Common LiftMaster Garage Door Opener Repair Issues.
Springs and cables matter
If a spring is worn or failing, the door can become dangerously heavy. Springs and cables are not safe for DIY handling. If the door feels heavy or jerky, stop and schedule a professional inspection.
Tools and Planning Homeowners Should Know About
Many homeowners like to understand what goes into an installation, even if they plan to hire an expert. A basic plan helps you avoid surprises.
Here is what most installs require:
- Stable ladder access
- Ceiling joist finding
- Correct mounting hardware
- Safe power outlet nearby
- Clear sensor pathway
If your garage has no outlet near the opener location, you may need an electrician to add one. Extension cords are not a safe long-term solution for a garage door opener.
Step-by-Step LiftMaster Garage Door Opener Installation Overview
This is the typical installation flow. The exact details vary by model, but the major steps stay consistent.
Step 1: Confirm headroom and centerline
The rail must run straight and centered over the door. If it is off-center, the door arm can bind during movement.
Key alignment checks:
- Rail centered on the door
- Motor level and stable
- Door bracket centered
Step 2: Assemble the rail and mount the opener
Most LiftMaster units ship with a rail assembly. The rail must be assembled correctly so the trolley moves smoothly.
Common mistakes here:
- Loose rail bolts
- Misaligned rail sections
- Over-tightened fasteners
A loose rail can cause rattling and uneven travel.
Step 3: Install the header bracket and door bracket
The header bracket attaches above the door opening and carries the major force during lifting. It must be anchored into solid framing, not thin trim.
Important mounting points:
- Solid wood framing
- Proper lag screws
- Correct bracket height
The door bracket must also be installed securely. If it pulls loose, the door can jerk, or the arm can bend.
Step 4: Hang the opener from the ceiling supports
The opener should not hang from thin straps alone. It needs stable supports that reduce vibration and hold alignment over time.
A good support setup includes:
- Braced angle supports
- Secure joist anchoring
- Even weight distribution
This is one of the biggest reasons professional installation feels quieter and smoother.
Step 5: Install safety sensors correctly
Safety sensors must face each other across the door opening, close to the floor. If they are too high, they may not protect kids and pets. If they are misaligned, the door may refuse to close.
Sensor setup basics:
- Sensors are low to the floor
- Lenses face each other
- Wires secured neatly
Many “installation problems” are actually sensor placement or wiring issues.
Step 6: Install the wall control and wiring
Wall controls should be installed at a safe height, where kids cannot reach. Wiring should be routed neatly and protected from staples that crush the wire.
Wall control checks:
- Mounted at a safe height
- Wire not pinched
- Buttons respond fast
Step 7: Set travel limits and force settings
This step is critical. Travel limits tell the opener how far to open and close. Force settings control how the opener reacts when it senses resistance.
If these are wrong, you may see:
- Door reverses early
- The door hits the floor hard
- The door stops halfway
A professional installer will test multiple cycles and confirm a safe reversal response.
Step 8: Pair remotes and keypad
After installation, the remotes and keypad must be paired using the Learn button process. This is also when you choose a new keypad PIN.
Pairing steps usually include:
- Press Learn once
- Press the remote button
- Confirm light flash
Step 9: Test safety features
A proper LiftMaster Garage Door Opener installation includes safety testing, not just “it opens and closes.”
Safety tests include:
- Sensor beam test
- Auto reverse test
- Manual release test
If the door does not reverse properly, it needs correction before daily use.
Adding myQ and Getting a Stable Connection
Many LiftMaster openers include myQ connectivity, which lets you control and monitor the door from your phone. It is a great feature when it is installed and connected correctly.
What homeowners need for myQ
Most setups need a strong 2.4 GHz Wi Fi signal at the opener.
myQ connection needs:
- Strong Wi Fi signal
- Updated myQ app
- Correct router settings
- Stable network name
In Irvine homes, garages can be signal dead zones due to walls, appliances, and distance from the router. A Wi Fi extender or mesh node near the garage can help.
Common myQ setup problems
If myQ will not connect, the issue is often one of these:
- Weak Wi Fi signal
- Router using 5 GHz only
- Password entry errors
- App permissions blocked
If the opener’s Wi Fi was changed or cleared, you may need to reconnect it in the myQ app.
Common Installation Mistakes That Cause Future Problems
Even if an opener works on day one, small issues can create noise, strain, and repeat repair calls.
Misaligned rail and door arm
If the rail is not centered, the door arm can pull unevenly. This can lead to jerking, popping noises, and premature wear.
Common signs:
- The door shakes while moving
- Loud clicking sounds
- Uneven opening speed
Weak mounting supports
If the opener is not supported correctly, it can vibrate and shift. That can loosen bolts and throw off alignment over time.
Signs of weak support:
- Opener sways while running
- Rattling near the ceiling
- Bolts loosening often
Sensors installed too high or wired poorly
Sensors need proper height and stable brackets. Wires should be routed cleanly and not crushed.
Signs of sensor trouble:
- The door will not close
- Lights flash repeatedly
- Must hold the wall button
Door condition ignored
If the door is heavy or binding, the opener will struggle. Many homeowners install an opener and only then realize the door has worn rollers, track issues, or spring problems.
If the system becomes noisy or inconsistent after setup, This Old House breaks down common causes in how to repair a garage door opener, which can help homeowners describe symptoms clearly before scheduling service.
When Installation Becomes a Repair vs Replace Decision
Sometimes homeowners start with installation questions, but the real issue is that the current opener is aging, unreliable, or missing modern safety features.
You might be closer to replacement if:
- The opener is very old
- Parts are failing often
- myQ not supported
- Safety features outdated
You might be closer to repair if:
- Opener is newer
- The issue is the sensors only
- Remotes lost pairing
- Travel settings off
If you are on the fence, read When to Repair or Replace a LiftMaster Garage Door Opener.
What Homeowners in Irvine Should Expect From a Professional Install
A professional LiftMaster garage door opener installation should leave you with a system that feels smooth, quiet, and consistent.
A full install typically includes:
- Door balance check
- Hardware inspection
- Proper bracket anchoring
- Clean wiring routing
- Travel and force setup
- Full safety testing
It should also include explaining how the system works, how to use the manual release, and how to reconnect remotes and myQ if anything changes in the future.
Ready for a Smooth, Quiet Lift Every Day
A LiftMaster garage door opener installation is worth doing correctly because it affects safety, daily convenience, and long-term reliability. When the opener is matched to the door, mounted securely, and tuned with the right travel and force settings, your door should open and close with steady movement and predictable response.
Ocean Coast Garage Doors serves Irvine homeowners with careful installation, clean setup, and complete safety testing so your LiftMaster system performs the way it should from day one. Contact us or give us a call.
Frequently Asked Questions
[sp_easyaccordion id=”3734″]